Wednesday, August 6, 2014

While the husband was away....

I got to work with Operation Make Our House a Home... If you ask my it was pretty successful. Here's some pictures of some of my updates!
The curtains all came from Ross. I believe they were all $15 for a set. I have been collecting  the "R" for the past year. I'm in love with the boot picture! When I had the Whiskey and Rhinestones booth at The Red Bluff Bull and Gelding Sale the neighboring booth was selling the boot picture. My amazing grandma heard me talking about it and bought it for me :). The rug also came from Ross- It was the perfect color scheme and only $14
Tin "R"- Ross $12
Shelf mirror on the left- Yard Sale- $2

The small boat paddle was $5 at a thrift store. 
I scored the mirror in the corner from Hobby Lobby- only $12, originally $118.
Trunk was a Craigslist steal for $20

The White crate was form Joann's. I payed about $5 after a coupon. I painted it white, sanded it and wiped stain on it. Its now perfect for our remotes on the coffee table.


Sorry for the clutter and my dog, Sage.
I gave the bookcase a makeover with fabric it cost less than $10 and makes such a big difference.
The chest in the corner was another Craigslist find for $50. The ladder was free from my mom and used to be in a chicken coop lol

Paisley runner rug- Ross- $14

Close up of my purty table :)

This rug probably wont stay right here to long. Its actually a patio rug from Lows. I couldnt pass it up for only $12. One day when I get the energy ill re do my patio... Until then, I think it looks great where it is.

My bar tools are a work in progress. Sorry for the dark picture.

My counter was over run with clutter. So I purchased a wooden crate from Walmart- $8 and spray painted it white. For under $10 its the perfect way for me to organize all my cookbooks and it fits in with my rstic decor.


One of my best friends painted me the Sunflower picture a few years ago. Shutter is from a resale store. I believe I paid $5 for it. It has been all over with me at Whiskey and Rhinestones shows.

Sage approves :) I think I was successful on adding more charm and color to our home... and best part I didn't spend tooo much. Out of the items I did purchase, it was a span of a few years. Bryan was a little overwhelmed once he got home, but he said he didnt hate it :) lol

Home Makeover!

Bryan was away on a fire for 15 days so I had lots of time for projects! Here's my projects in pictures, I will be posting tutorials or more detailed posts for most of them this week. I'm very happy about how things have turned out, our house feels so much more like a home!


Sunday, August 3, 2014

Bar Stool Revamp

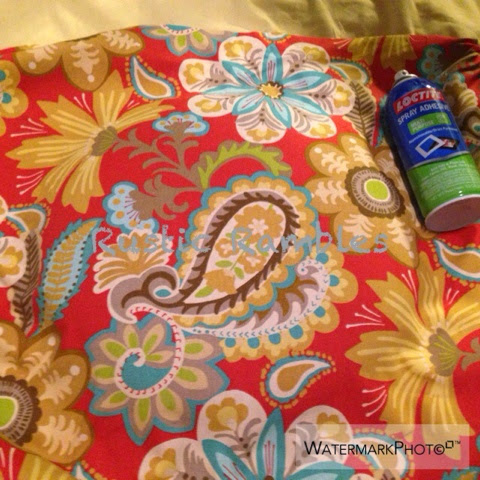
Our bar stools were looking a tad to boring for my taste. I had some turquoise and orange fabric from my pillows and it was the perfect amount for this project. I purchased some hammered bronze spray paint- this was my test project, since theses turned out so great I'll tackle painting our ugly gold light fixtures next.

I took off the padded seat.

Grabbed my spray adhesive and layed my fabric over the seat to find the perfect position for it.

I then sprayed the seat with the adhesive and smoothed to over the top of the seat and around the edges. I was so nervous about this step but it was so easy!

I cut all the acess fabric off. I did leave about an inch around the edge.

I ran and got some staples for my staple gun but as always- I have crapy luck and they didnt fit- the box said they were the corect size but oh well. I was not about to go back in the 100+ heat so I made do. I broke the staples apart and hammered them around the edges.

Not bad at all for my first time.

I then lightly sanded the stool and then took it to my shower to rinse it and wash it real good with soap.
Again- anything to avoid the heat for aslong as posible lol

After it was nice and clean, I drug it outside to dry off. I retreated inside with my BFF- the AC for 10 min.

Once it was dry I sprayed it down with the hammered bronze paint. It took one can.

About two hours later after it was dry I put it back together. Please ignore the mess in the picture lol. I love the finished product. So much better than the plain black.

One down, two to go! I can't wait to see them all together once finished!


Bookcase Makeover

We bought this bookcase a few years ago, it's nothing fancy but it does the job. Eventually I would like to make a bookcase out of my antique doors, but in till then, we're making the best out of what we have.

The before- just a boring bookcase

I found on Pinterest where people were lining the back of book cases with fabric. Some were adhering the fabric right to the case it's self while others attached the fabric to foam board and then to the case it's self. As with most craft projects, a little trial and error is required.

I wanted to use spray adhesive but I live in a little town that doesn't have spray adhesive... Boo... And at the moment I didn't feel like driving 30 min just to pick some up.

I first tried fowling a tutorial with using corn starch. They said they attached it strait to the wood. I figured it try it with the foam board. http://www.soyouthinkyourecrafty.com/how-to-create-fabric-wallpape/
I set the boards on the fabric and cut it out.

I whipped up the corn starch mixture-
Mix 2 Tablespoons cornstarch with 1/4 cup tap water
Bring 2 cups of water to a boil
Mix boiling water with tap water cornstarch mixture
Let cool and then paint on to project

After it cooled, I started painting it on the foam board.

I started at one end and worked to the other side stretching out the wrinkles as I go.

After it's wrinkle free I started painting on the corn starch mixture over the whole thing again.

After it was fully covered I left it over night to dry- it was warping up a little but no big deal- I planned on hot gluing it to the back of the book case so it didn't matter.

When I checked on it in the morning I found this-
Boo

Yeah, it didn't work- the foam board had a paper layer and it pealed up with the fabric.

Soooo I ran to Walmart and picked up some spray adhesive.

Since I already cut my fabric up and used my foam board, I decided to just attach the fabric right to the cardboard back of the bookcase. I sprayed half of the book case at a time. I sprayed it down and then lined up the corners and started rubbing it down getting out all the wrinkles.


The edges were a little ragged so I pulled out the exacto knife.

I trimmed all the edges and stepped back to admire it... Yes a manicure is in my future. Lol


And then I knickknack attacked it :)

FYI that ugly globe thing is all my husband. He got it from a white elephant party a few years ago. I figured it fits in with our rustic decor, so there it sits. The owls both came from Ross.

I'm loving this project. It costs less than $10 and makes such a huge impact on our living room. I love the pop of color!

Saturday, August 2, 2014

Bottoms Up

Northern Ca summers can be miserable and one thing to make it a little better is an ice cold cocktail! Yesterday was 100 degrees so I retreated to the fridge to wip up my favorite summer time drink- pineapple upside down cake!


All you need is a glass, any brand of cake vodka, grenadine and pineapple juice. Cherry are optional if you have then on hand.

Add your desired amount of vodka- I do two fingers full.

Poor in the pineapple juice

A splash of grenadine 

Isn't it beautiful? And it tastes even better! Toss in a cherry or two if you have any on hand.

Mmmm tastes like summer time!